- Three face options – choose one
- Mechanisms
- Brand guidelines
- Get feedback
- Update essay again – am i creating enough insight and argument?
- Start pdf – plan of what to include and layout ideas
Design development
Over these two weeks I really set about getting some drawings and designs started for how my installation would look and work.
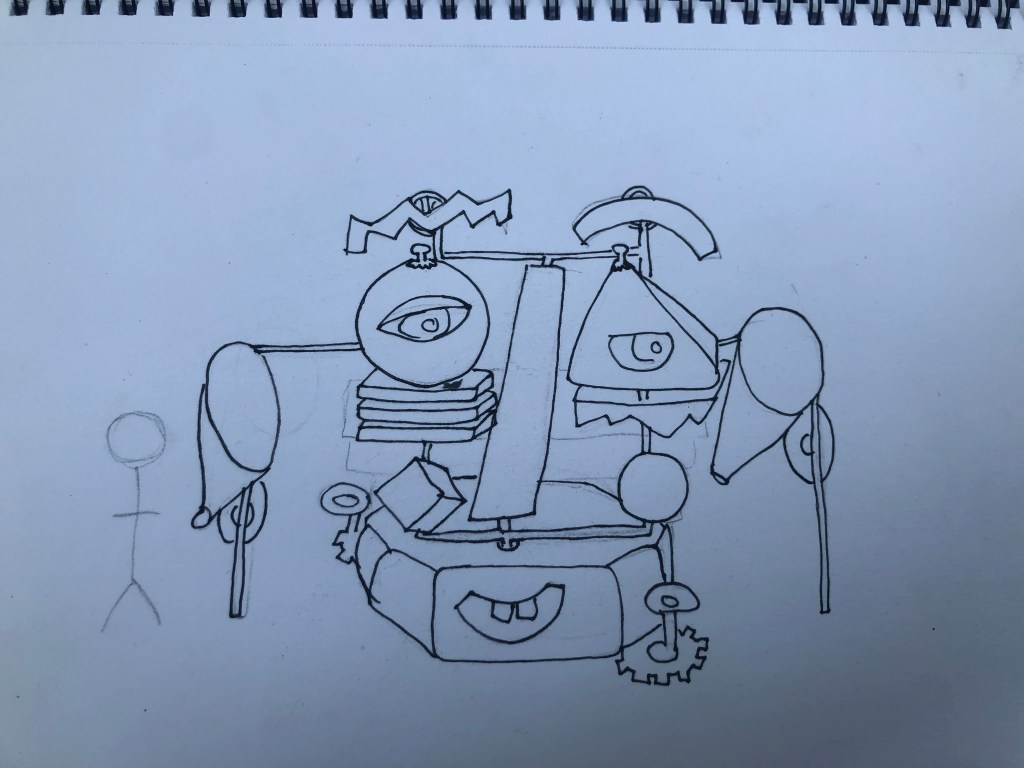
I sketched multiple different ways of approaching the design now that i had an idea of mechanisms.


I looked at an option of making the shapes 3d like children’s building blocks. This gave a nice solid look to the installation and was very reminiscent of childhood in my mind. It also gave me the option of being able to spin the different shapes around to reveal different facial features as a way of changing the expression of the installation.
I tried two different versions of this style, either suspending the blocks on bars or layering blocks on top of each other.

I think the blocks suspended on bars has a better look to it and allows for more space for me to add wheels and mechanisms.
I also looked at the different expressions i could use on thesides of the shapes

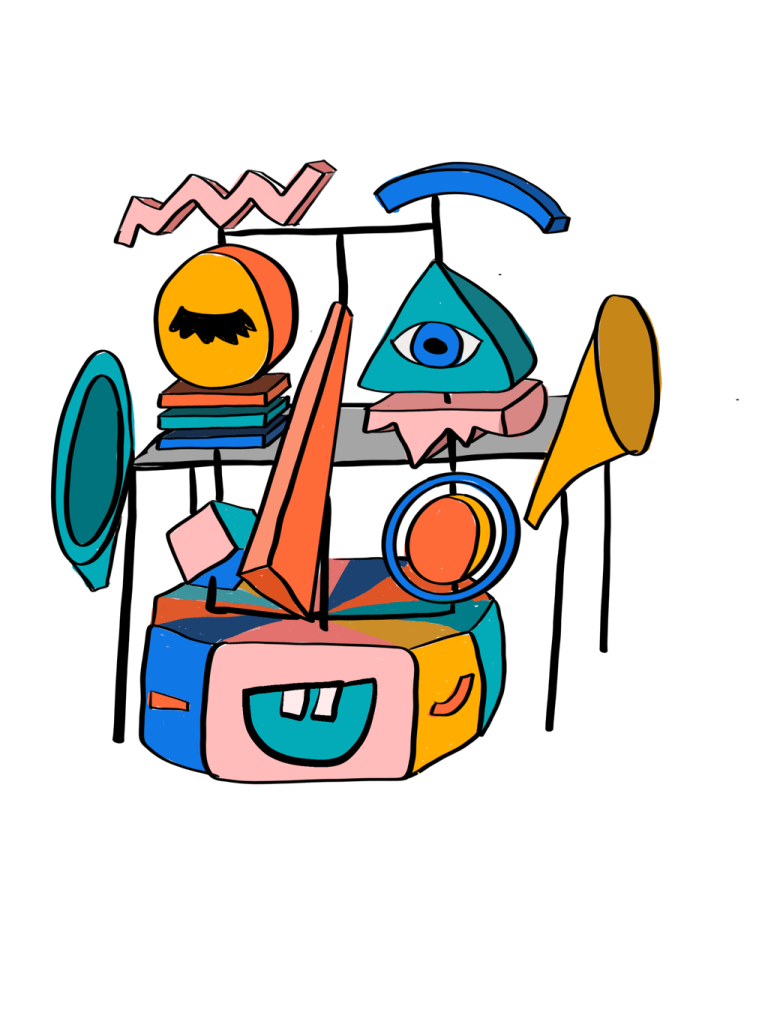
I bought this onto procreate to digitalise the drawing and add colour to see how it might look.
Mechanisms
From this potential structure I started to look at the mechanisms I could use to move each element of the face.

For the mouth section I looked at getting an octagon to rotate revealing different mouths. To turn the shape around two separate cogs would need to be turned on either side of the shape – so one person would be unable to do it alone, you need two people to make it work and possibly even a third to select the desired mouth.

For the eyes I considered using teeth shapes to lock the shapes onto their pole, which would need pulling away from the shape, top and bottom, to allow the shape to spin on its pole. Again this action would need two people minimum as the teeth would want to be pulled back into place (possibly because of a spring of some kind) so would need to be held out away from the eye.
After looking at this i came to the conclusion that placing the eyes on separate poels to the eyebrows could make both sections easier to use. I also decided that the decoration under the eyes (or the eyelashes) could be utilised as part of the mechanism – giving people something to pull down.

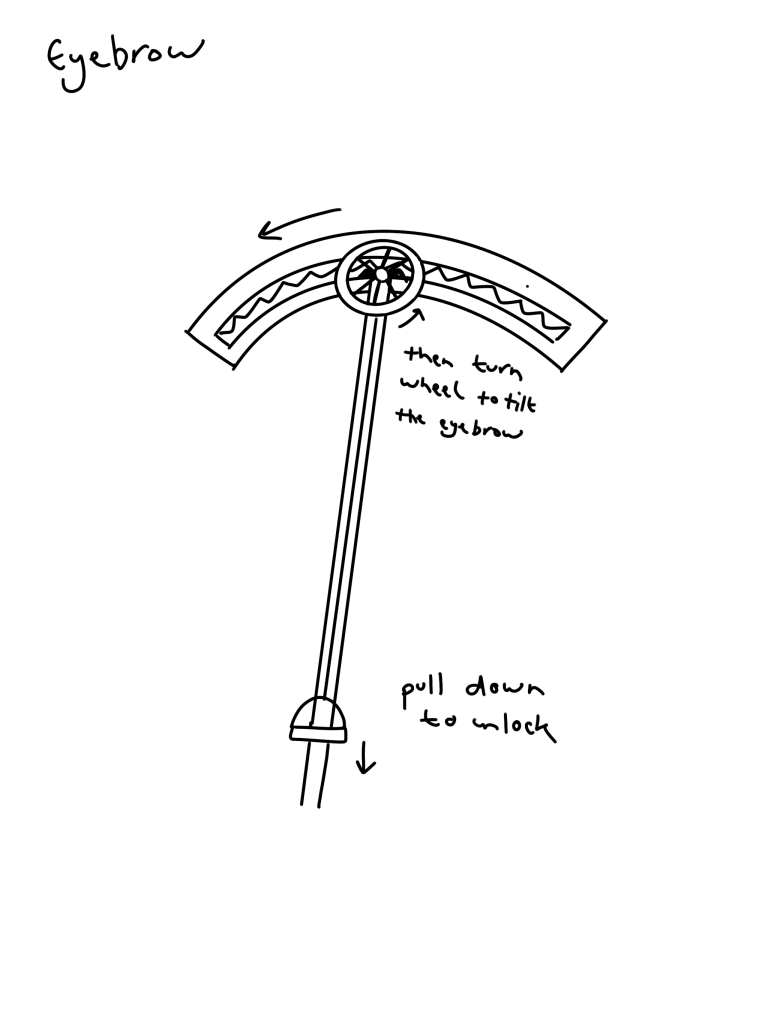
For the eyebrows, I wanted them to be able to be angled to change the faces expression. I looked at using a wheel to turn and move the eyebrow along a serrated edge to slowly change the angle. To make this into a two person activity, I could have the wheel locked until a handle or lever is pulled lower down the pole. This would have to be pulled the whole time the eyebrow was being moved, meaning it needed two people to operate.

The cheeks could spin freely to change their colour. I think adding in another mechanism here would make the installation too busy and complicated so i will probably just leave these to spin.

I also think the nose will probably be fixed. I toyed with the idea of moving it to be bigger and smaller but given its position and the other mechanisms i think keeping it fixed in place might be a better idea.

With the ears i thought maybe they could be big funnels to amplify the sounds of the city
I sketched out how this might all work together

As the installation is quite large, i will need to put some kind of platform at the back of it to allow people to access the top mechanisms.
I also sketched some ideas for this

With these mechanisms in mind i drew the installation out again to see how this could all look.

I then digitised these drawings as well as the mechanism ideas i had come up with.


With the platform at the back I decided to make the steps curved, influenced by the post-modern design of the TVam studios and in particular this brilliant staircase:

I have started to feel quite happy with the look and design of my installation, but it is hard to really understand what it will look like in 3D. I decided to try and create a basic 3D rendering of the design. After speaking to others, i chose sketchup as the tool to use. Having never worked in 3D before it was a very steep learning curve and involved a lot of youtube tutorials to even work out how to use Sketchup. However, after a lot of failed attempts I managed to create a (slightly wonky) 3D rendering of what I want my installation to roughly look like.
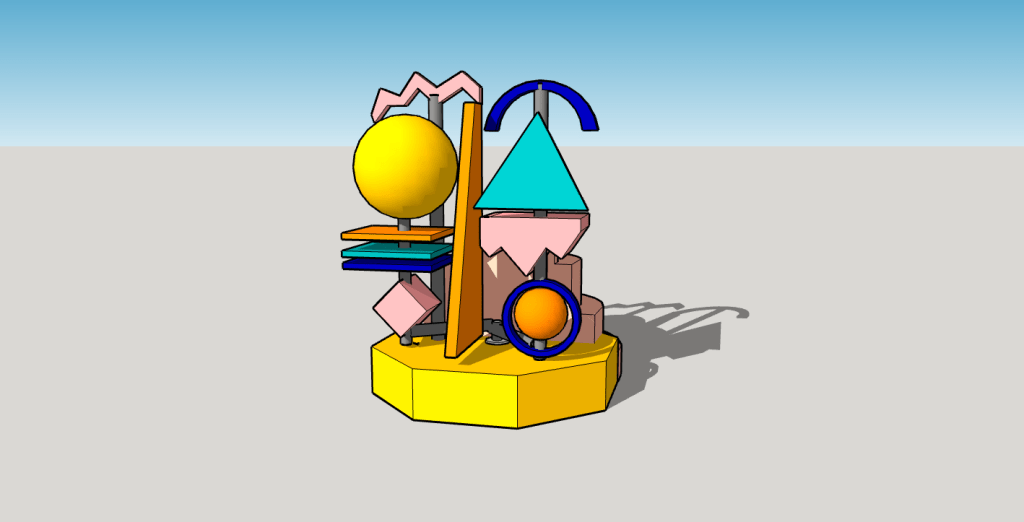
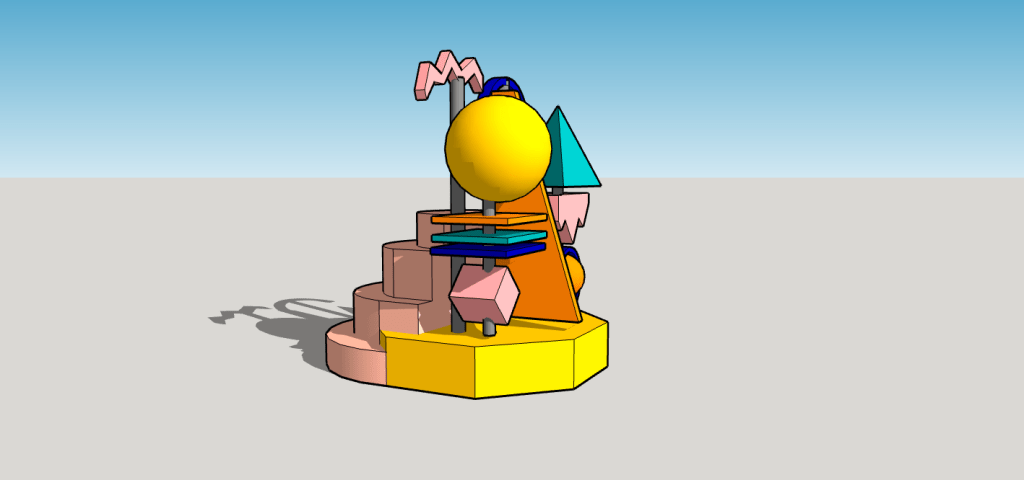
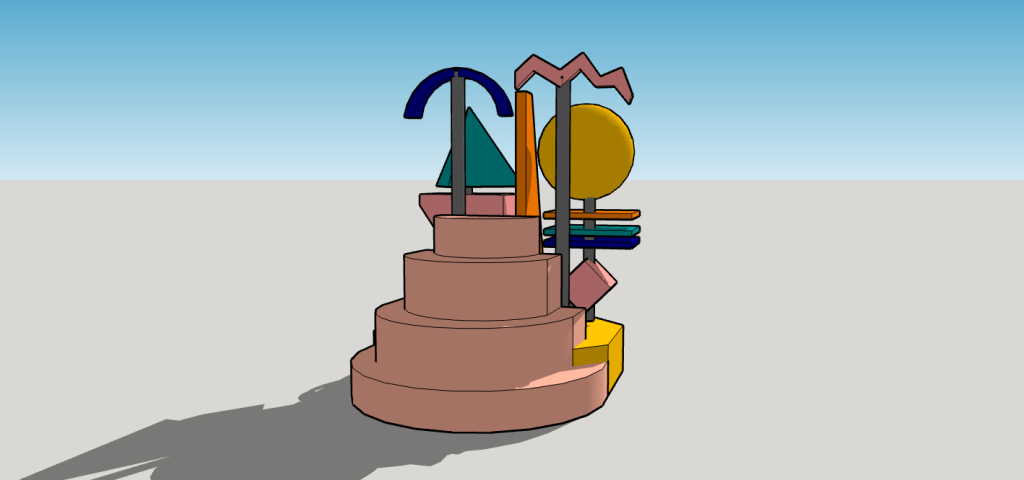
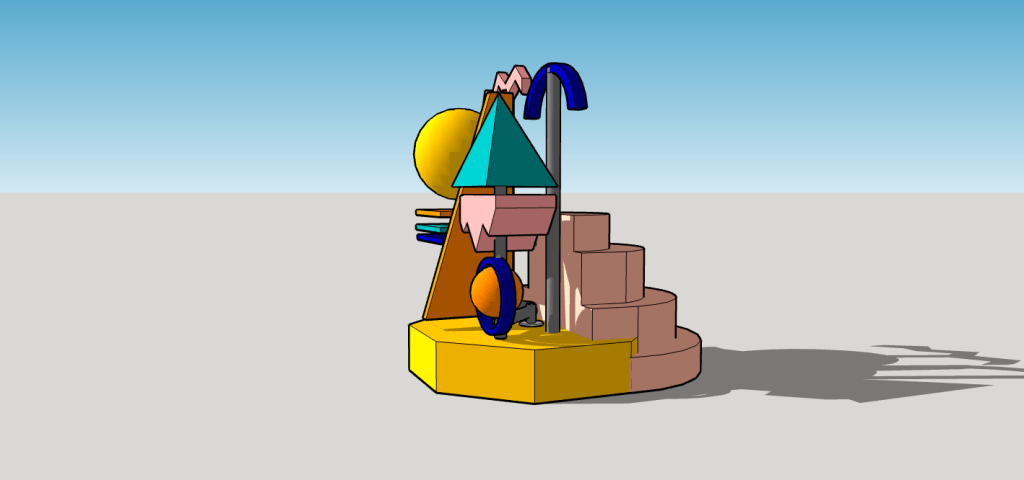
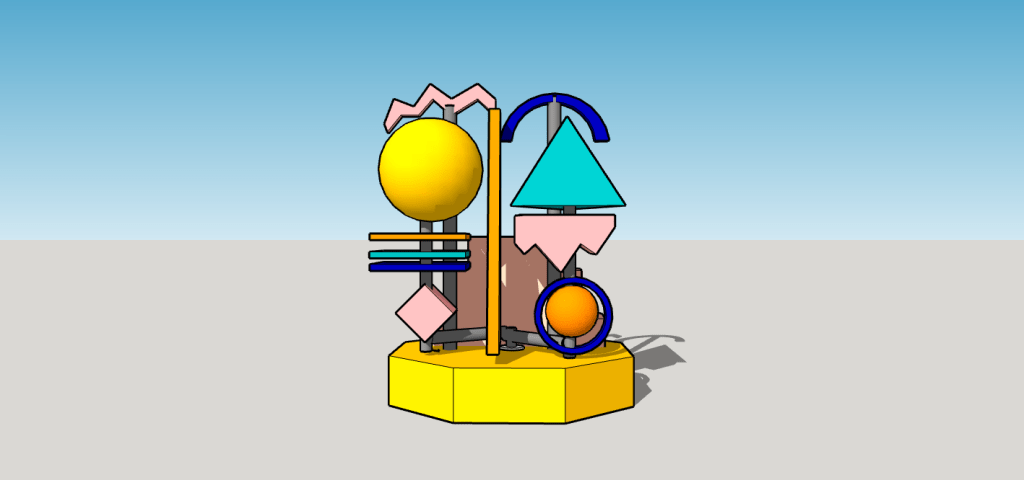
It also allowed me to consider how it would look from all sides and at different times of day.
Additional things to consider for installation
Texture
Sound
Safety
I spoke to a nursery school teacher about play and toys to help get inspiration of ways I could take elements for childhood toys. That way it would help intcie people by getting them to reminisce about play when they were younger, but packaging these toys up into something that can played with as adults.
We discussed the use of mirrors and glass to create an even more playful atmosphere and allow the light to also play with the installation throughout the day, even when no one was interacting with it.
We discussed using sounds, and objects like rain sticks and an ‘ear drum’ to make noises using the installation. I also want the mechanisms to make noises as they are used, giving people a satisfying amount of feedback for interacting with it.
Another idea was the use of a kaleidoscope as part of the eyes somehow to bring a childhood toy within the installation.
It also may be possible to turn the nose of the installation into some kind of slide, making the whole thing feel a bit more like a playground. I am not sure how this would work alongside the other features, as I wouldn’t want it to block the view of any other sections.

Poster/ sign
I think my installation will need some kind of poster/signpost to explain what it is and how it should be used. I think this is important as its aimed at adults an in my reserach i found that adults need to feel very comfortable in a situation to play and be sure that playing is the approproate response to the situation.
I had a think about the wording and how a sign could look. It would need to be clear and simple so people can glance at it and understand, while also giving some context and insight for people who choose to read the whole thing.


PDF Plan
I have also started to think about how i will organise my PDF to ensure it covers all the aspects of my project. I wrote down a list to use as a starting point to this.

Reflection
In these two weeks I have also been working further on my essay to get it ready for hand in. I have also started designing it up into a magazine format in the branding style I developed for this project. With this I have tried to keep it fun and playful, without sacrificing the readability of the essay.
I am quite happy with how my project is progressing and the look of my installation. What i am struggling a bit with at the moment is showing what I have in my head well enough for others to understand. I think more time wokring on Sketchup will help me with this so i can make my model on there look exactly as I have in my mind. As i wont be able to make this installation in real life, i need work out how to best show every part of it.

Leave a comment